Rear Sliding Window Module Replacement
Rear Sliding Window Module Replacement
Removal Procedure
Important: The new rear sliding window motor/module is equipped with the bracket and relays.
1. Remove the rear sliding window lower garnish molding.
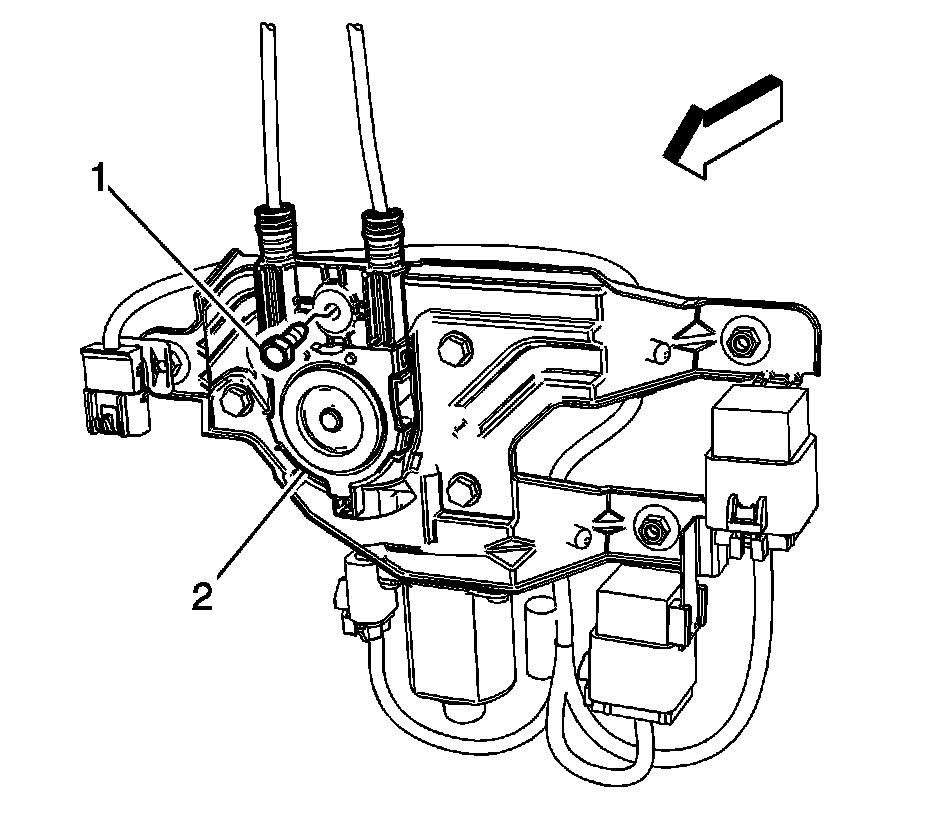
2. Cycle the rear sliding window to the fully closed position.
3. Remove the screw (1) from the rear sliding window regulator and cables (2).
4. Pull forward on the regulator and cables (2) to release it from the motor/module.
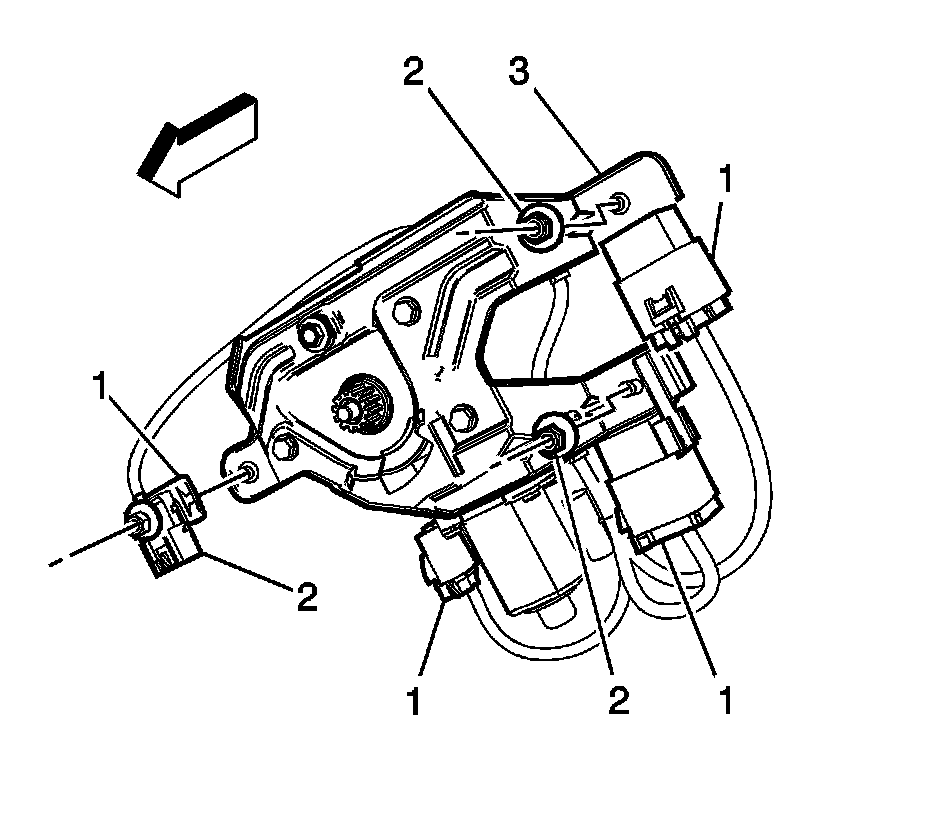
5. Remove the rear sliding window motor/module nuts (2).
6. Disconnect the rear sliding window electrical connectors from the motor/module and relays (1).
7. Remove the rear sliding window motor/module assembly from the vehicle.
Installation Procedure
1. Install the rear sliding window motor/module assembly to the vehicle.
2. Connect the rear sliding window electrical connectors to the motor/module and relays (1).
Notice: Refer to Fastener Notice.
3. Install the rear sliding window motor/module nuts (2).
Tighten nut to 10 N.m (89 lb in).
4. Install the rear sliding window regulator and cables (2) to the motor/module.
5. Install the bolt (1) to the rear sliding window regulator and cables (2).
Tighten bolt to 11 N.m (97 lb in).
6. Install the rear sliding window lower garnish molding.
7. Inspect the rear sliding window for proper operation.