Evaporator Core: Service and Repair
Air Conditioning Evaporator Core Replacement
Removal Procedure
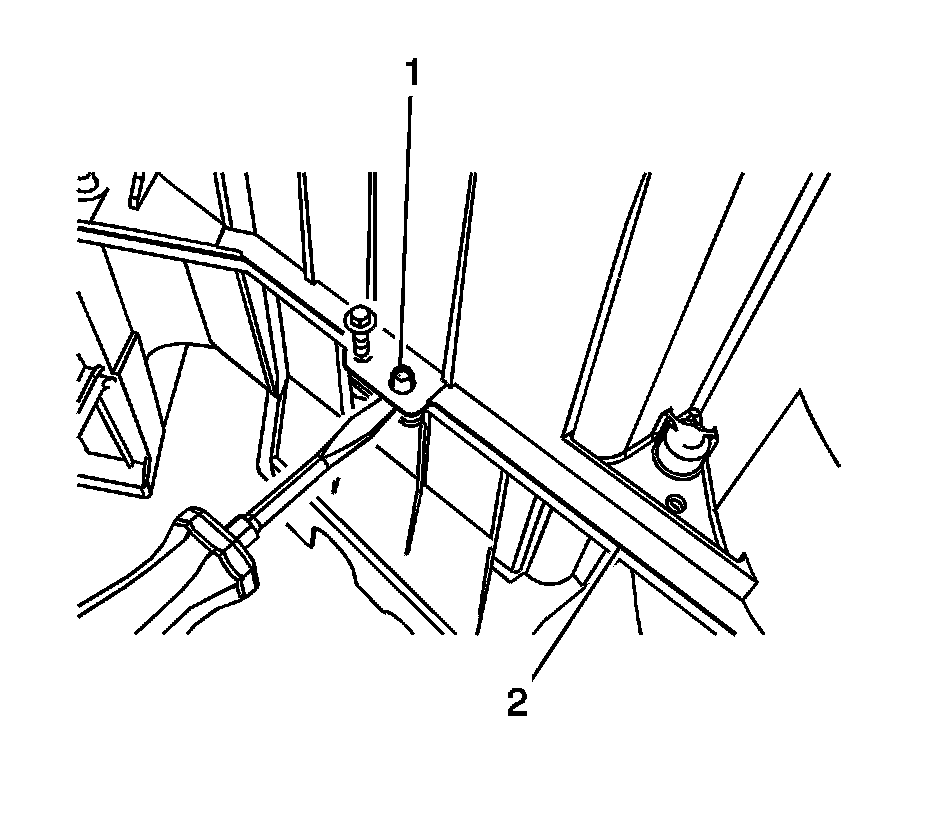
1. Remove the HVAC module.
2. If equipped remove the heat stakes (1) from the HVAC module (2) with a screw driver and a hammer.
3. Disconnect all wiring connections from blower motor, blower motor control module and sensors. Also, remove all wiring from retainers before removal.
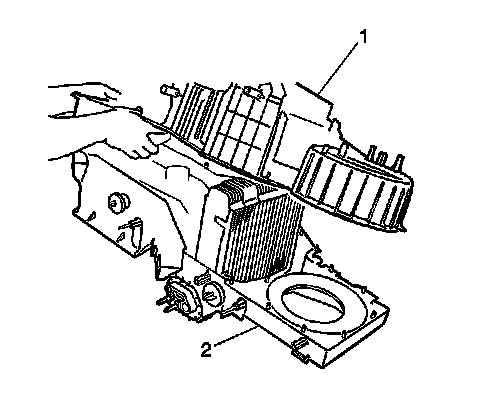
4. If equipped remove the screws from the HVAC module assembly.
5. Remove the evaporator cowl gasket from the evaporator.
6. Separate the upper HVAC module assembly (2) from the lower HVAC module assembly (1)
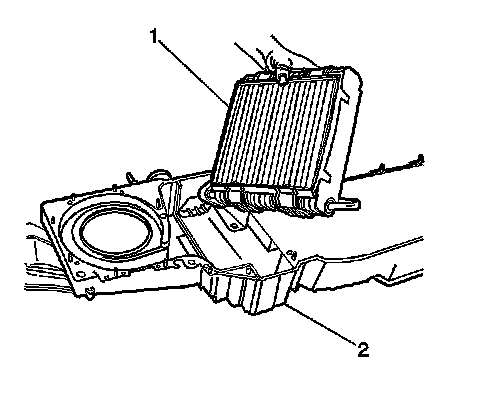
7. Remove the evaporator core (1) from the upper HVAC module assembly (2).
Installation Procedure
Important: If replacing the evaporator core, add the refrigerant oil to the evaporator core. Refer to Refrigerant System Capacities.
1. Install the evaporator core (1) to the HVAC module assembly (2).
2. Install the upper HVAC module assembly (2) from the lower HVAC module assembly (1)
3. Install the evaporator cowl gasket to the evaporator.
Notice: Refer to Fastener Notice.
4. Install the screws to the HVAC module assembly.
Tighten the screws to 2 N.m (18 lb in).
5. Install the HVAC module assembly.