Rear Axle Shaft Replacement (8.6 Inch Axle w/Drum Brake W/VSES)
Rear Axle Shaft Replacement (8.6 Inch Axle w/Drum Brake w/VSES)
Special Tools
* J 2619-01 Slide Hammer
* J 45859 Axle Remover
Removal Procedure
1. Raise and support the vehicle. Refer to Lifting and Jacking the Vehicle
2. Remove the tire and wheel assembly. Refer to Tire and Wheel Removal and Installation (Service and Repair) .
3. Remove the rear wheel speed sensor. Refer to Rear Wheel Speed Sensor Replacement .
4. Remove the rear cover and gasket. Refer to Rear Axle Housing Cover and Gasket Replacement (Service and Repair) .
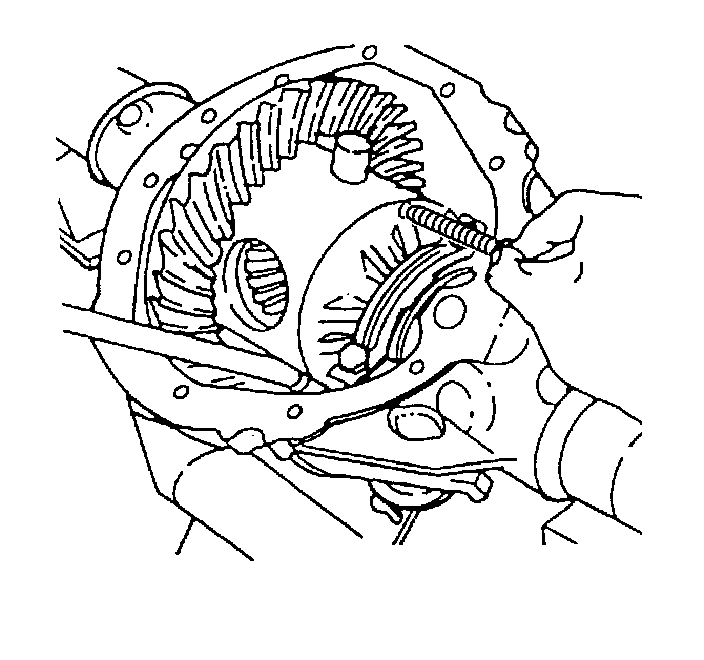
5. Remove the pinion shaft locking bolt.
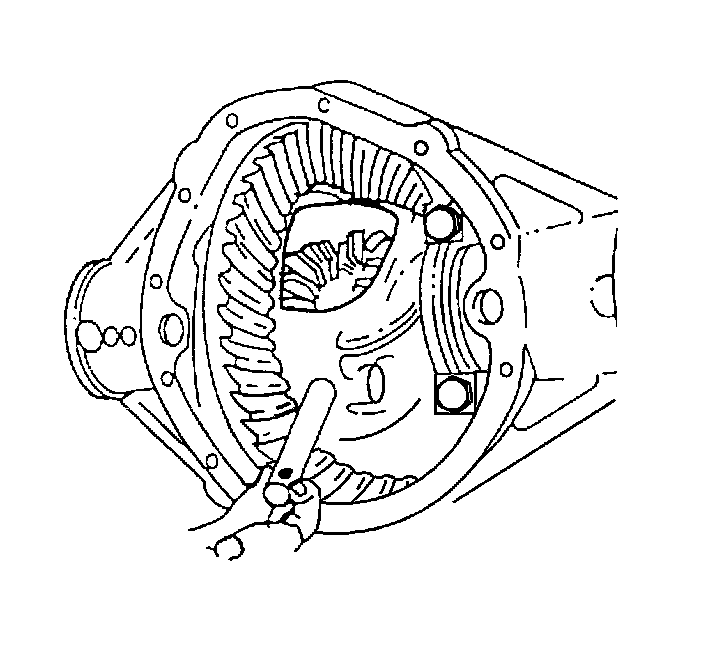
6. On axles without locking differentials, remove the pinion shaft.
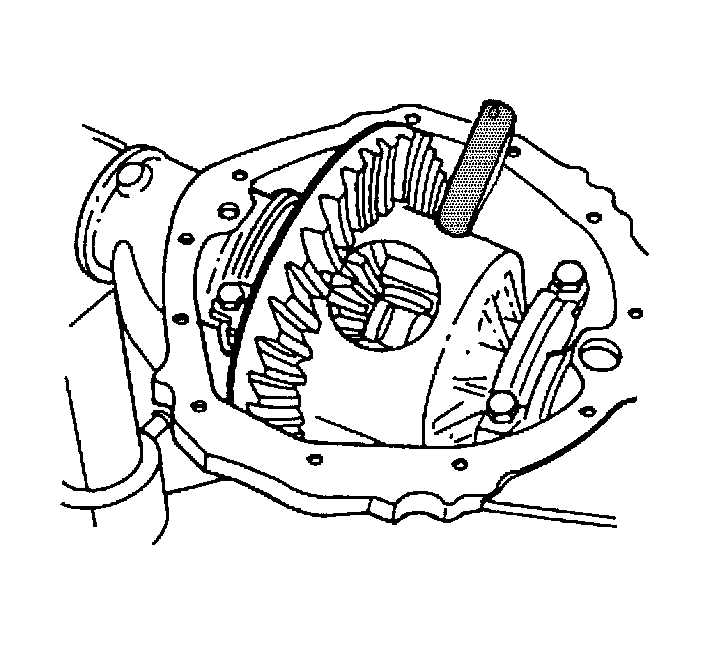
7. On axles with a locking differential, remove the shaft part way. Rotate the case until the pinion shaft touches the differential housing.
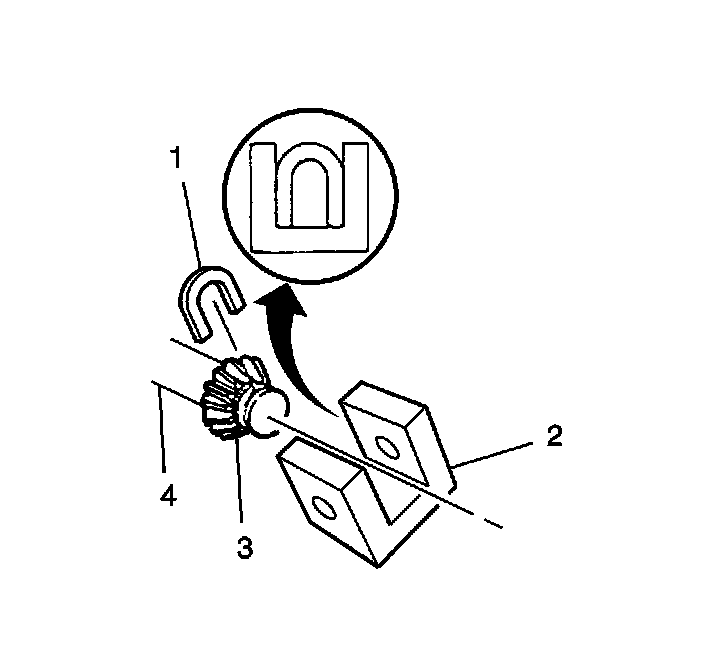
8. On axles with a locking differential, use a screw driver, or similar tool, in order to enter the differential case and rotate the C-lock (1) until the C-lock aligns with the thrust block (2).
9. Remove the brake drum.
10. Push inward on the axle shaft.
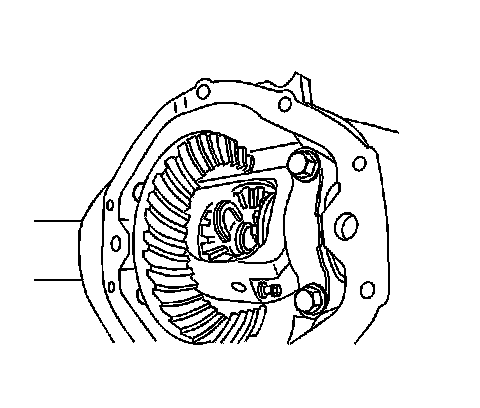
11. Remove the C-lock from the axle shaft.
12. Remove the axle shaft from the differential housing.
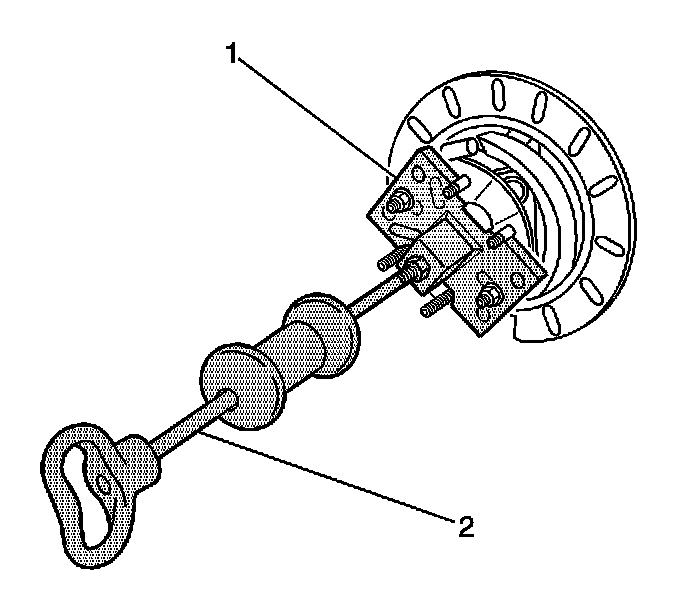
Important: If the axle is difficult to remove, perform the following service procedure.
13. Using the J 45859 (1) and the J 2619-01 (2), remove the axle shaft from the differential housing.
Installation Procedure
1. Install the axle shaft in the differential housing allowing the splines to engage the differential side gears.
2. On axles without a locking differential, place the C-lock on the button end of the axle shaft.
3. On axles with a locking differential, keep the pinion shaft partially withdrawn.
4. Install the brake drum
5. On axles with a locking differential, place the C-lock (1) on the axle shaft (3) so that the ends are flush with the thrust block (2).
6. On axles with a non-locking differential, place the C-lock on the button of the of axle shaft.
7. Pull the axle shaft outward in order to seat the lock in the differential gear.
8. Align the hole in the pinion shaft with the bolt hole in the differential case.
Notice: Refer to Fastener Notice .
9. Install the new pinion shaft locking bolt.
Tighten the bolt to 34 N.m (25 lb ft).
10. Install the rear axle cover and gasket. Refer to Rear Axle Housing Cover and Gasket Replacement (Service and Repair) .
11. Install the rear wheel speed sensor. Refer to Rear Wheel Speed Sensor Replacement .
12. Install the tire and wheel assembly. Refer to Tire and Wheel Removal and Installation (Service and Repair) .
13. Fill the rear axle with fluid. Refer to Rear Axle Lubricant Level Inspection (11.5 Inch Axle) (Rear Axle Lubricant Level Inspection (11.5 Inch Axle))Rear Axle Lubricant Level Inspection (8.6, 9.5 LD Axle) (Rear Axle Lubricant Level Inspection (8.6, 9.5 LD Axle))Rear Axle Lubricant Level Inspection (10.5 Inch Axle) (Rear Axle Lubricant Level Inspection (10.5 Inch Axle)) .
14. Remove the support and lower the vehicle.