Evaporative Emission Canister Replacement (15 Regular Cab)
Evaporative Emission Canister Replacement (15 Regular Cab)
Removal Procedure
Important: Clean all evaporative emission (EVAP) connections and surrounding areas prior to disconnecting the lines in order to avoid possible system contamination.
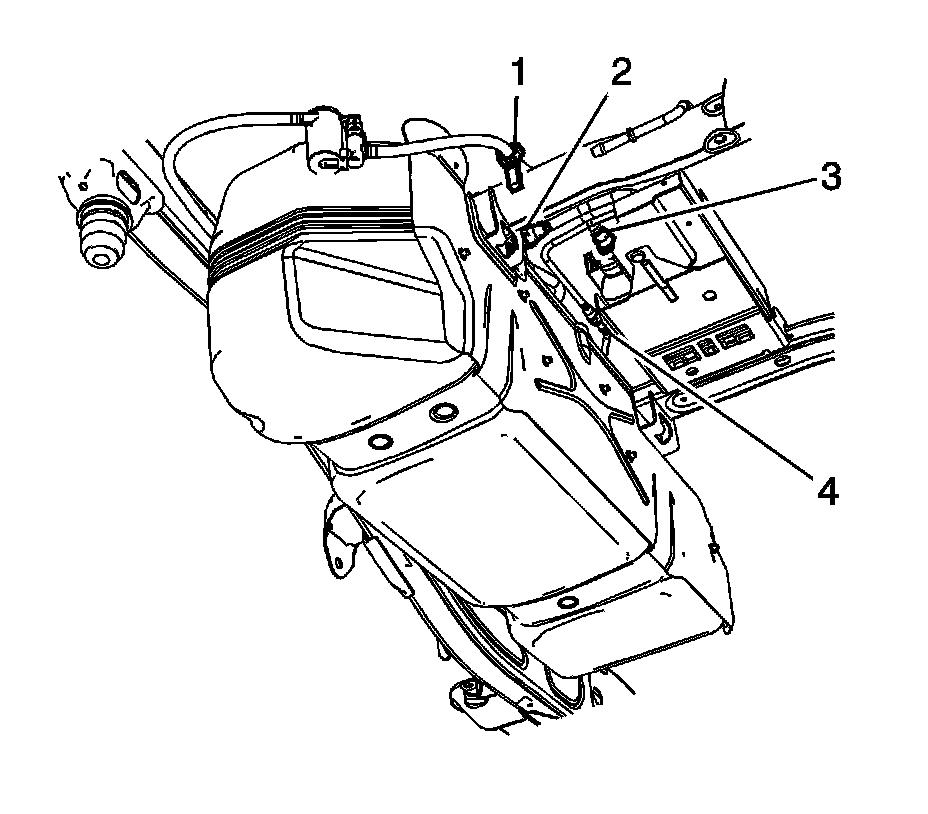
1. Raise and suitably support the vehicle. Refer to Vehicle Lifting.
2. Disconnect the EVAP canister pipe quick connect fitting (2) from the fuel tank EVAP pipe.
3. Disconnect the EVAP canister vent solenoid pipe quick connect fitting (3) from the EVAP canister.
4. Disconnect the EVAP canister pipe quick connect fitting (4) from the fuel tank EVAP pipe.
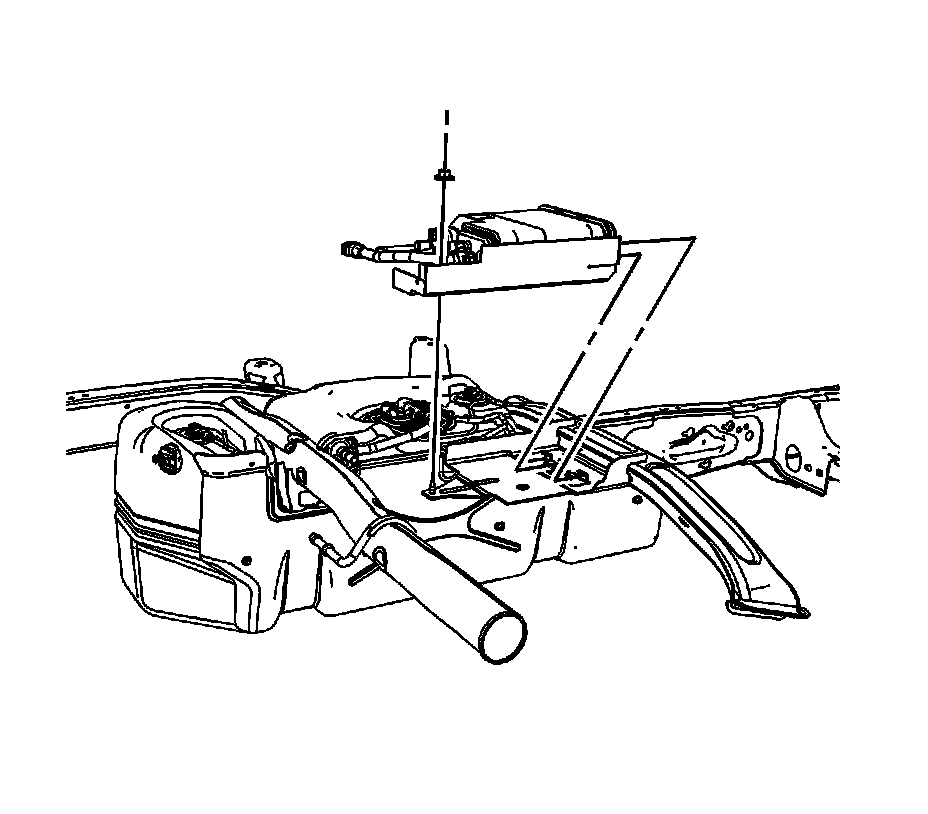
5. Remove the EVAP canister nut. (body shown removed, for clarity).
6. Remove the EVAP canister assembly.
7. If replacing the EVAP canister perform the following steps, otherwise proceed to step 4 in the installation procedure.
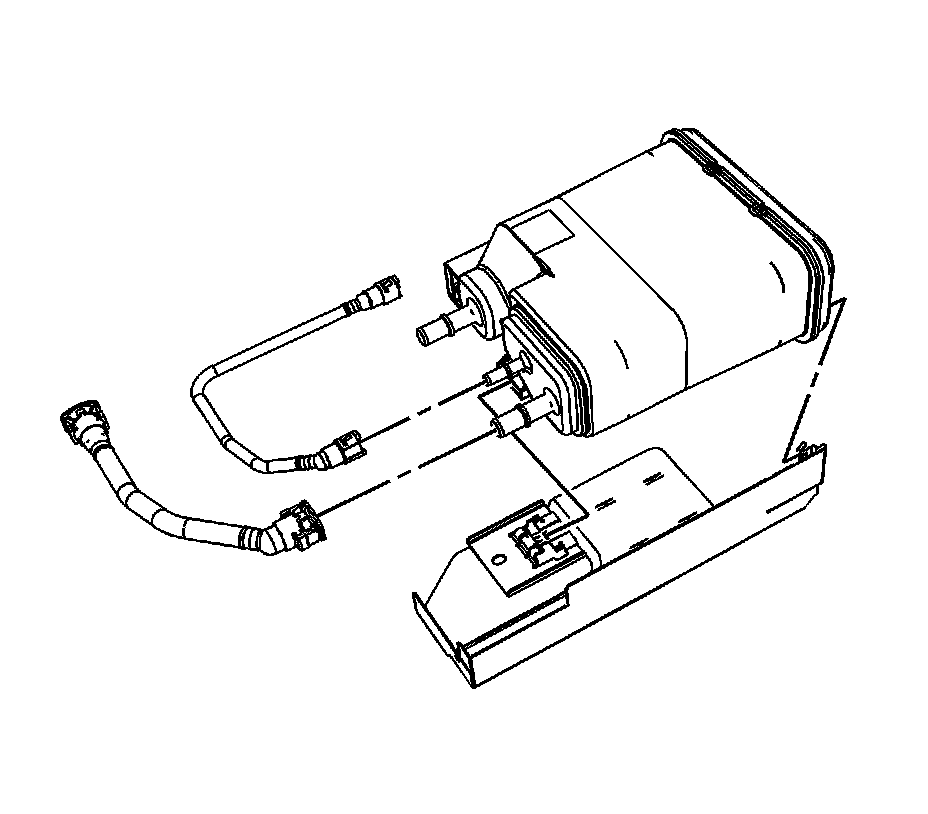
8. Remove the EVAP canister from the shield.
9. Disconnect the EVAP canister pipes from the canister.
Installation Procedure
1. If replacing the EVAP canister perform the following steps, otherwise proceed to step 4.
2. Connect the EVAP canister pipes to the canister.
3. Install the EVAP canister to the shield.
4. Install the EVAP canister assembly.
Notice: Refer to Fastener Notice.
5. Install the EVAP canister nut.
Tighten the nut to 25 N.m (18 lb ft).
6. Connect the EVAP canister pipe quick connect fitting (4) to the fuel tank EVAP pipe.
7. Connect the EVAP canister vent solenoid pipe quick connect fitting (3) to the EVAP canister.
8. Connect the EVAP canister pipe quick connect fitting (2) to the fuel tank EVAP pipe.
9. Lower the vehicle.